

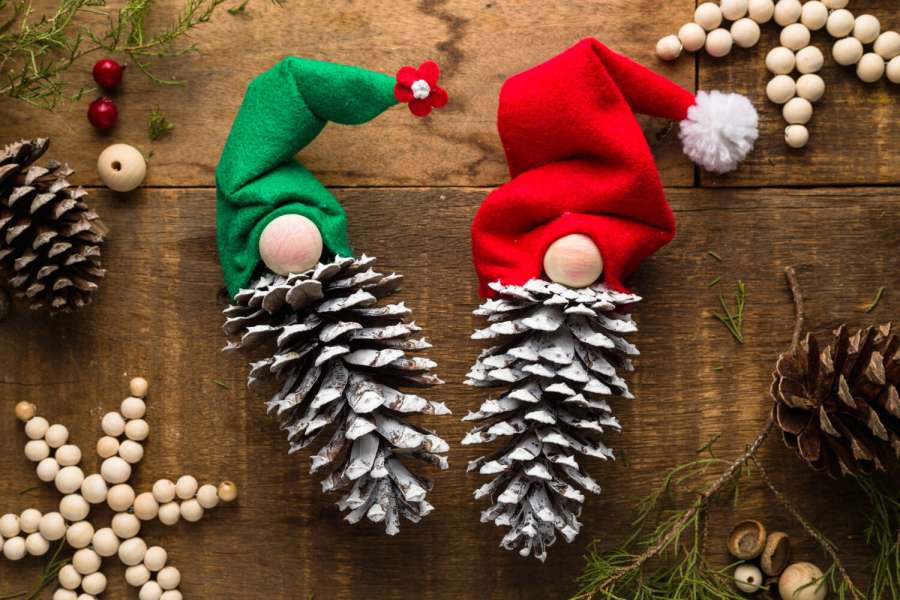
This Christmas, create paper pine cone lights in two different methods to bring the beauty of the Crafts With Pine Cones.
Will you make the recycled corrugated card pine cone decoration or the fabulously tactile and glittering paper pine cone decorations? Or why not both?
When it concerns Christmas décor, pine cones are a popular choice. These paper replicas look fantastic when arranged in a group on a mantelpiece, suspended from a door handle, or hung one at a time on a tree. As an alternative, a group of these paper pine cone flowers would be a wonderful table decoration when placed in a fruit bowl.
Read Also: Craft Ideas For 14 Inch Raw Wood Plates: Crafting Memories 2025
How to Create Pine Cone Decorations for Your Home?
Pine cone projects
- Check out our collection of Christmas pine cone crafts if you're seeking for inventive ways to use genuine Pine cone crafts for kids.
- Using pins to secure folded paper or card scales onto a plain polystyrene egg, followed by a finishing touch of glitter and a few berries, both designs are simple and quick to create.
- We adore these pine cone and poinsettia patterned papers, so check out our free patterned paper collection if you're seeking for paper to build your own Crafts With Pine Cones!
How to decorate with a paper pine cone?
You'll require:
- Ten-cm and seven-cm styrofoam eggs with patterns
- Red wired berries that are artificial
- Pins from Glitter Dressmaker (250–300 per pine cone)
- Adhesive (craft glue that is sticky works great)
- Ribbon
Must Read: How To Craft A Saddle In Minecraft? My Complete Guide 2025
Step One
Cut the paper into squares that are 2 cm by 2 cm.
To form a triangle along one side, fold two corners to the back. Position the point of the folded edge in the center of the egg and pin it, starting from the narrow end of the egg, which will serve as the top of the pine cone. Use two pins to secure the Pine cone crafts for adults.
Step Two
After pinning the foundation layer, proceed to the next row, aligning the pointed end to the join formed by the meeting of two folded pieces on the first layer.
Keep the pointed end free and fasten with two pins at the base. Work three more pieces of folded paper around the egg.
Step Three
As you construct your paper pine cone decoration, keep working in rows around the egg. You'll need to use additional folded pieces to wrap around the perimeter of the egg as it becomes bigger. Make an effort to cover any pins and spaces from the earlier layers in order to get a "bricking effect."
Continue moving along the egg until all of the polystyrene has been coated.
Cut three leaf forms out of plain or patterned green paper once the entire egg has been coated with "scales." Attach a ribbon loop to the paper pine cone with a strong adhesive and let it dry. Your leaves can be adhered to the ribbon's end to conceal the Crafts With Pine Cones.
How can I create a pine cone ornament out of corrugated card?
You'll require:
- Card made of corrugation
- Draw around a 10 penny piece (or a round pound coin if you still have one!) or use a 70mm polystyrene egg 25mm circular punch.
- The green card
- Big red pearls that stick
- Pins for ribbons
- Glue
First Step
Cut about 70 circles out of corrugated card using a 25mm circle punch. To make sure the card fits within the punch, you might need to take off the backing layer. As an alternative, sketch an antique round pound or a Pine cone crafts for Christmas.
You May Also Like: Creative Craft Keywords That Start With C: Crafting Inspiration
Step Two
Pin two opposing circles to the narrow end of a 70mm polystyrene egg so that their bottoms contact. Add two additional circles and pin them so that they meet at the bottom and overlap the first two. Continue adding rows of circles until you reach the top, pinning each one so that they slightly overlap.
Step Three
Use two pins to secure the ends of a narrow red ribbon looped around the top of the egg. To hide the pins, cut a slit in the center of one of the circles and wrap it around the ribbon at the top of the egg. Use glue to secure.
Make your paper pine cones unique.
Adding your own flair is, of course, the finest part of becoming crafty! You may experiment with different papers and materials to create a variety of colors and patterns for your paper pine cones, or you can stick to a more straightforward design and use realistic hues. The option is Painted pine cone crafts!
Materials Required to Clean and Get Pinecones Ready for Crafts
- Pine Cones: Collect pine cones from a forest or your yard, making sure they are clear of debris and somewhat dry.
- Baking Sheet: To clean pine cones using the baking method, use a regular baking sheet.
- Aluminum Foil: To collect any resin drips and facilitate cleanup, line the baking sheet with aluminum foil.
- Freezer-Ready Container: To use the freezing method, you will need to place the pine cones in an airtight container or a sealed plastic bag before freezing.
- Oven (for Baking Method): at bake the pine cones, preheat your oven at a low temperature of around 200°F (93°C).
How to Get Pine Cones Ready for Decorating or Crafting?
However, you should consider whether you enjoy bugs, sap, and other unpleasant things in your pine cones before using them.
Pinecone Soaking and Cleaning
Some like to soak their pine cones as a method of preparation. This may be done in a bucket, big bowl, or sink. Just soak your pine cones for 30 to 40 minutes after mixing 1/2 cup white vinegar with 1/2 cup water. They will seal up, so be careful not to keep them in for too long. After removing them and giving them a good rinsing, spread them out on a baking sheet to air dry. In a day or two, they ought to be ready to travel.
Read Also: Maricome Art Work: Mystique of Maricome Art Techniques
Methods for Bleaching Pine Cones for Decoration or Crafts
Do you know what bleaching pinecones is? Before reading a lovely blog article from my friend Yvonne at StoneGable, I hadn't. Like me, she loves to decorate with natural materials, and her ideas are always the finest!
I fell in love with her photos the moment I noticed how gorgeous the bleached pine cones were! Although I've seen painted pine cones, I don't believe they're as good as bleached ones.
FAQs
Do you have to clean pine cones before crafting?
Are you prepared to create crafts with pine cones? Not so quick! Pinecones should be cleaned before being brought inside from the outside.
Are pine cones good for burning?
The burning properties of eight North American pine species' cones were recently studied by Fonda and Varner (2004), who discovered that pine cones may smolder for more than 80 minutes, flame for up to 15 minutes, and reach maximum flame lengths of more than 80 cm.
What kinds of crafts may pine cones be used for?
- Pinecone Hedgehog miniature.
- Pinecone bouquet for winter.
- Hedgehog Pinecone.
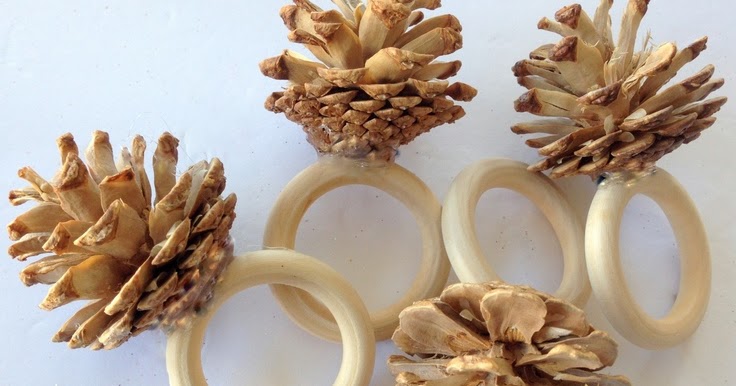
- Place Card Holder in a Pine Cone.
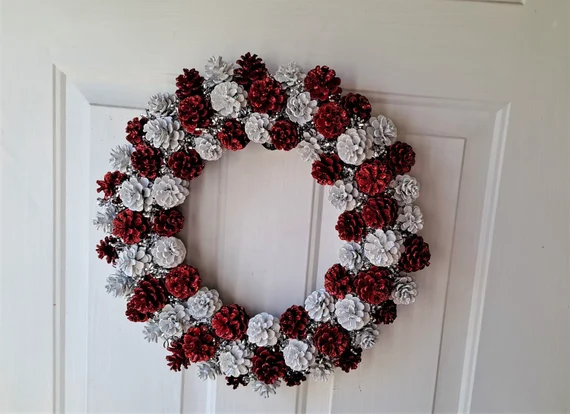
- Poinsettia Wreath made of rattan.
- Pine Cone Door Décor.
- Rat Pinecone.
- Decoration Pinecone Angel.
How long do pine cones need to dry before they burn?
At dry them out fast, place them in the oven set at a very low temperature (60 to 80 degrees Celsius) for around one hour.
Which adhesive works best for pine cones?
Glue. I made use of Flash and Bostik Fix (Amazon Affiliate link). It's not quite as simple as it seems, as everyone who has attempted to attach a stick to a pine cone knows. Flash and Bostik Fix are revolutionary for this free pine cone crafts.
What are the signs that a pine tree is about to burn?
It's a good sign that your firewood has seasoned when you see that the rich colors that were formerly there are becoming to pale brown or gray. Wood gets lighter in color as its moisture content decreases.
Other Articles
Simple Newcastle Logo Embroidery: A Guide to Precision and Style
Ten Mental Models for Learning


